
In June 2025, I passed my FAA instrument checkride. But not on the first try.
That’s right—my journey to the instrument rating came with a little detour: a disapproval notice. The FAA equivalent of a red card. And while it stung, it also taught me some of the most important lessons of my training.
Let me take you through what happened, why the second checkride was dramatically better, and what you can learn from my experience—especially if you’re preparing for your own IFR practical. Spoiler: the fix was 90% mindset, 10% tactical tweaks, and 0% overnight transformation.
A Tale of Two Checkrides
I started my instrument training in November, right as the Pacific Northwest transitioned into its usual moody gray. On one hand, the winter weather gave me plenty of actual IMC experience. On the other, it meant missed flights due to icing, turbulence, and one memorable time when even the hangar looked frozen over.
After months of training with some amazing instructors at Regal Air (more on them later), I scheduled my checkride. Things started okay—but then a late ATC call and unexpected traffic created pressure I wasn’t ready for. I ended up deviating establishing for a final course as I was given the clearance late, and that, combined with a few other small slip-ups, meant I didn’t pass.
Here’s the thing: no matter the external factors, the responsibility to recover is always mine. It took me a week to regroup, fly again, and pass on the second attempt—this time with a much clearer head.
Before we get into the tips, let’s talk about your best friend in this process: the Instrument Airman Certification Standards (ACS). If you’re not familiar with it yet, now’s the time. The ACS is the FAA’s official checklist of what you need to know and demonstrate—both in the oral and flight portions of your checkride. Your DPE (Designated Pilot Examiner) is required to evaluate you based on these standards, which means no mystery criteria or surprise pop quizzes (at least in theory). It lays out every task, the acceptable tolerances, and even the common reasons for failure. The more familiar you are with the ACS, the more confident and prepared you’ll feel. In fact, much of my checkride prep—especially for the second attempt—was simply aligning my habits and workflows to what the ACS expects.
So what changed? Let’s break it down.
1. Mindset Reset: Slowing Down to Speed Up
Looking back, the biggest difference between my first and second checkrides wasn’t technical skill—it was how I approached the tasks mentally. After the disapproval, I sat down and really tried to pinpoint what went wrong. The answer surprised me: I was trying too hard. Not in the “studied too much” kind of way, but in the “I can juggle ten flaming bowling pins while balancing on one foot” kind of way.
During the first ride, I was hyper-focused on staying ahead of the airplane, constantly trying to anticipate the next instruction, brief the next approach, enter the next waypoint—often all at once. Ironically, that effort to stay ahead actually caused me to fall behind. I was multitasking myself into mistakes. I’d miss a radio call, botch a checklist, or fumble the approach setup—not because I didn’t know how, but because I didn’t give each task the focus it needed.
So, for the second attempt, I made a deliberate decision: do one thing at a time.
When I’m assigned a climb, I climb. That’s it. I wait until I’m in a stable climb or level-off before touching the flight plan, briefing, or checklist. When it’s time to copy ATIS or load an approach, I scan away from the primary task for just 2–3 seconds, then immediately snap back to flying. I started treating my brain like it only had one processor core—not eight.
And the result? I felt calmer, more in control, and actually faster at completing tasks because I wasn’t undoing errors or mentally recovering from overload. This “mental task queue” approach—prioritizing, executing, and then moving on—was a game-changer. It wasn’t magic. It was just discipline and intentionality.
So if you’re getting overwhelmed, especially during training or your checkride, try this: slow down to speed up. Prioritize flying the plane, then deliberately work through everything else. Your DPE isn’t grading you on how many knobs you can twist at once—they’re looking for safe, stable, and thoughtful flying.
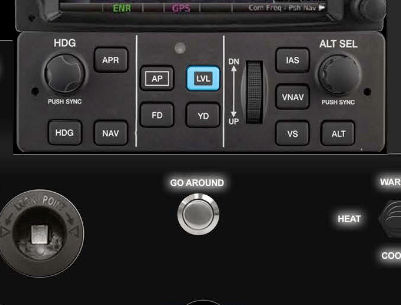
2. The Flight Director: Your Invisible Co-Pilot
My first ride included an autopilot approach, which meant my second ride required hand-flying the whole thing. That’s two hours of precision: altitude, heading, speed—all within the ACS standards. Spoiler: those tolerances are tight.
Enter: the Flight Director (FD).
I used the FD as a visual reference for pitch and bank. It showed me what the autopilot would do if it were engaged, without actually flying the plane for me. But here’s the trick: you still need to program it correctly. That means understanding autopilot modes cold—VS vs ALT, NAV vs HDG—and recognizing when the FD isn’t showing what you expect. If something’s wrong, disable it or ignore it, and then reprogram it.
Bonus: if the DPE says “you can use the autopilot now,” you’re already set up. Just hit the AP button.
Also, don’t shy away from using the moving map. My DPE encouraged it for holds and situational awareness. Some pilots think you should fly like it’s 1978 to prove your chops. Don’t. Use every tool in your disposal unless told otherwise.
3. ATC: The Unsung Ally … If You Ask Them
Flying in and around Seattle means you’re working with busy, brilliant (and occasionally chaotic) ATC teams. My pro tip: file your flight plan with the comment “FAA Practical Test.” While not officially required, this lets controllers know you’re on your checkride—and most will try to help you out.
That said, speak up! Ask for an “initial heading” if you need time to brief or set up your navigator. Don’t be shy about requesting “delay vectors” or asking them to “say again” if a call gets stepped on. My first checkride veered off course because of a late call from ATC to join the approach course. leading to a deviation from the standard. If I had asked for delayed vectors, this would have not been an issue.
You won’t get in trouble for asking for help. You might fail if you don’t.
Training at Paine Field (KPAE): A Workhorse with Class Bravo Views
I trained at Regal Air, based at Paine Field in Everett, Washington. Paine is an excellent airport for instrument students: it has two parallel runways, moderate commercial traffic (Alaska, FedEx, and friends), and real-world complexity without being overwhelming.
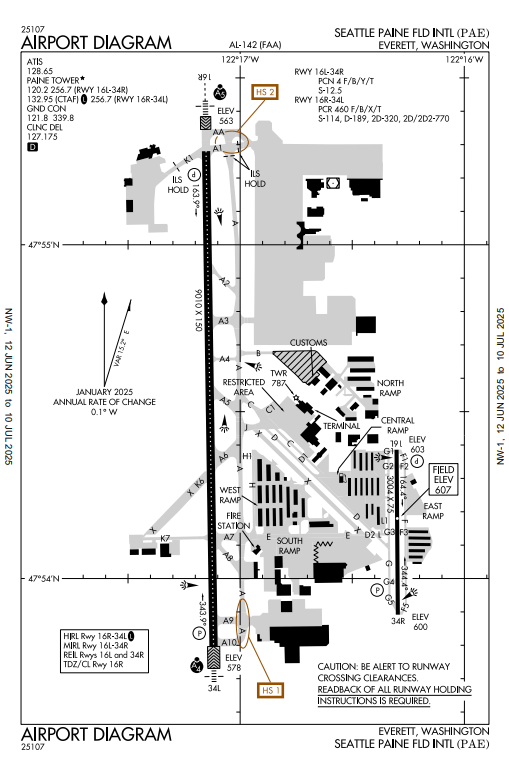
Regal’s fleet isn’t new, but it’s solid. They’ve got a couple of C172s outfitted with Garmin G3X, GTN navigators, and GFC autopilots. But what really sets them apart is the people.
I trained primarily with Matt Keefe and Tanner Haistings. Both are phenomenal instructors—technically sharp, calm under pressure, and fully invested in your success. If you’re flying out of KPAE and want to pursue your instrument, ask for them by name.
Final Approach
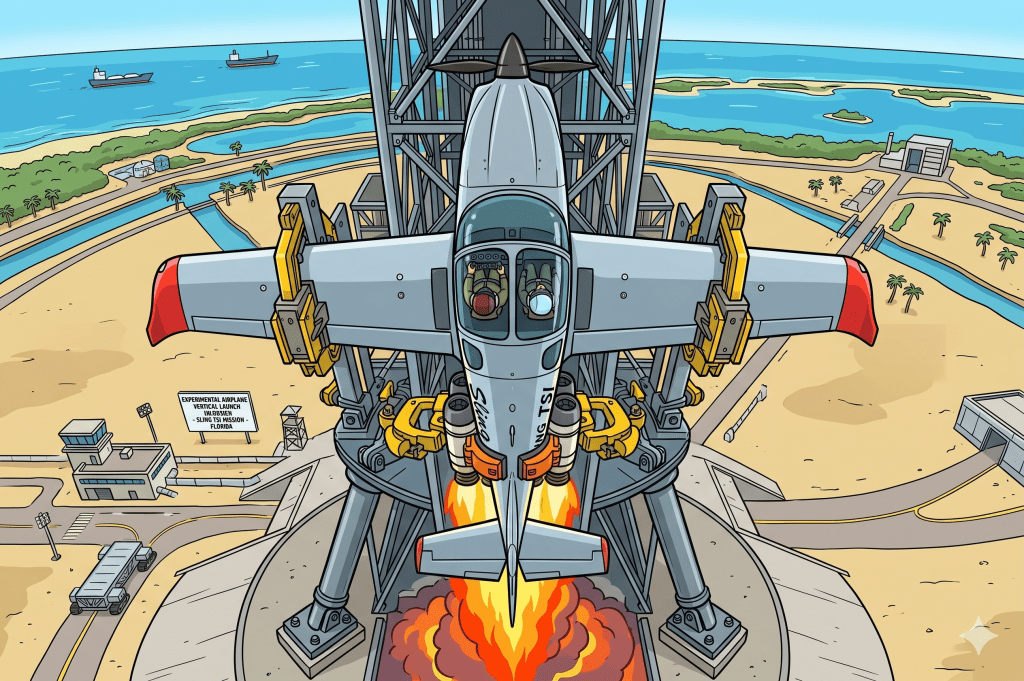
Passing the instrument checkride has been one of the most rewarding milestones of my aviation journey. It pushed me hard, taught me humility, and built skills I’ll carry into every flight from now on. Now, I can fly IFR across the country in my Sling TSi (once it’s done)—but more importantly, I know when and when not to fly IFR. That kind of judgment takes time, and I’m just getting started.
And if you’re preparing for your own checkride? Keep going. Everyone—from your CFII to your DPE—wants you to succeed.
Want to see how both of my checkrides went?
Here are the FlySto tracks:
🔗 First checkride (disapproval)
🔗 Second checkride (success!)


Leave a comment